Harrison House Backyard Renovation
The late spring rains pushed back the start of construction on our back yard, but we were finally able to break ground just after Easter. Just a little bit of history, when we first landscaped the backyard, we added a wide set of steps from the deck down to a large grass area, which made sense with two small kids. But, with the last number of years of drought conditions, it finally pushed us to remove the grass and rethink the overall design.
The other issue was the fairly substantial grade change from the upper barbecue area down to the pool. Thankfully, I love a terraced garden and I wanted to lean into that slope, and create a feeling of outdoor rooms. I also wanted to tackle the plantings with a bit more of a big picture approach and a lot less DIY from yours truly. You know, you get an azalea for Mother’s Day and when it won’t make it any longer inside, it gets put in your planting bed. Not a great long term approach to a beautiful garden.
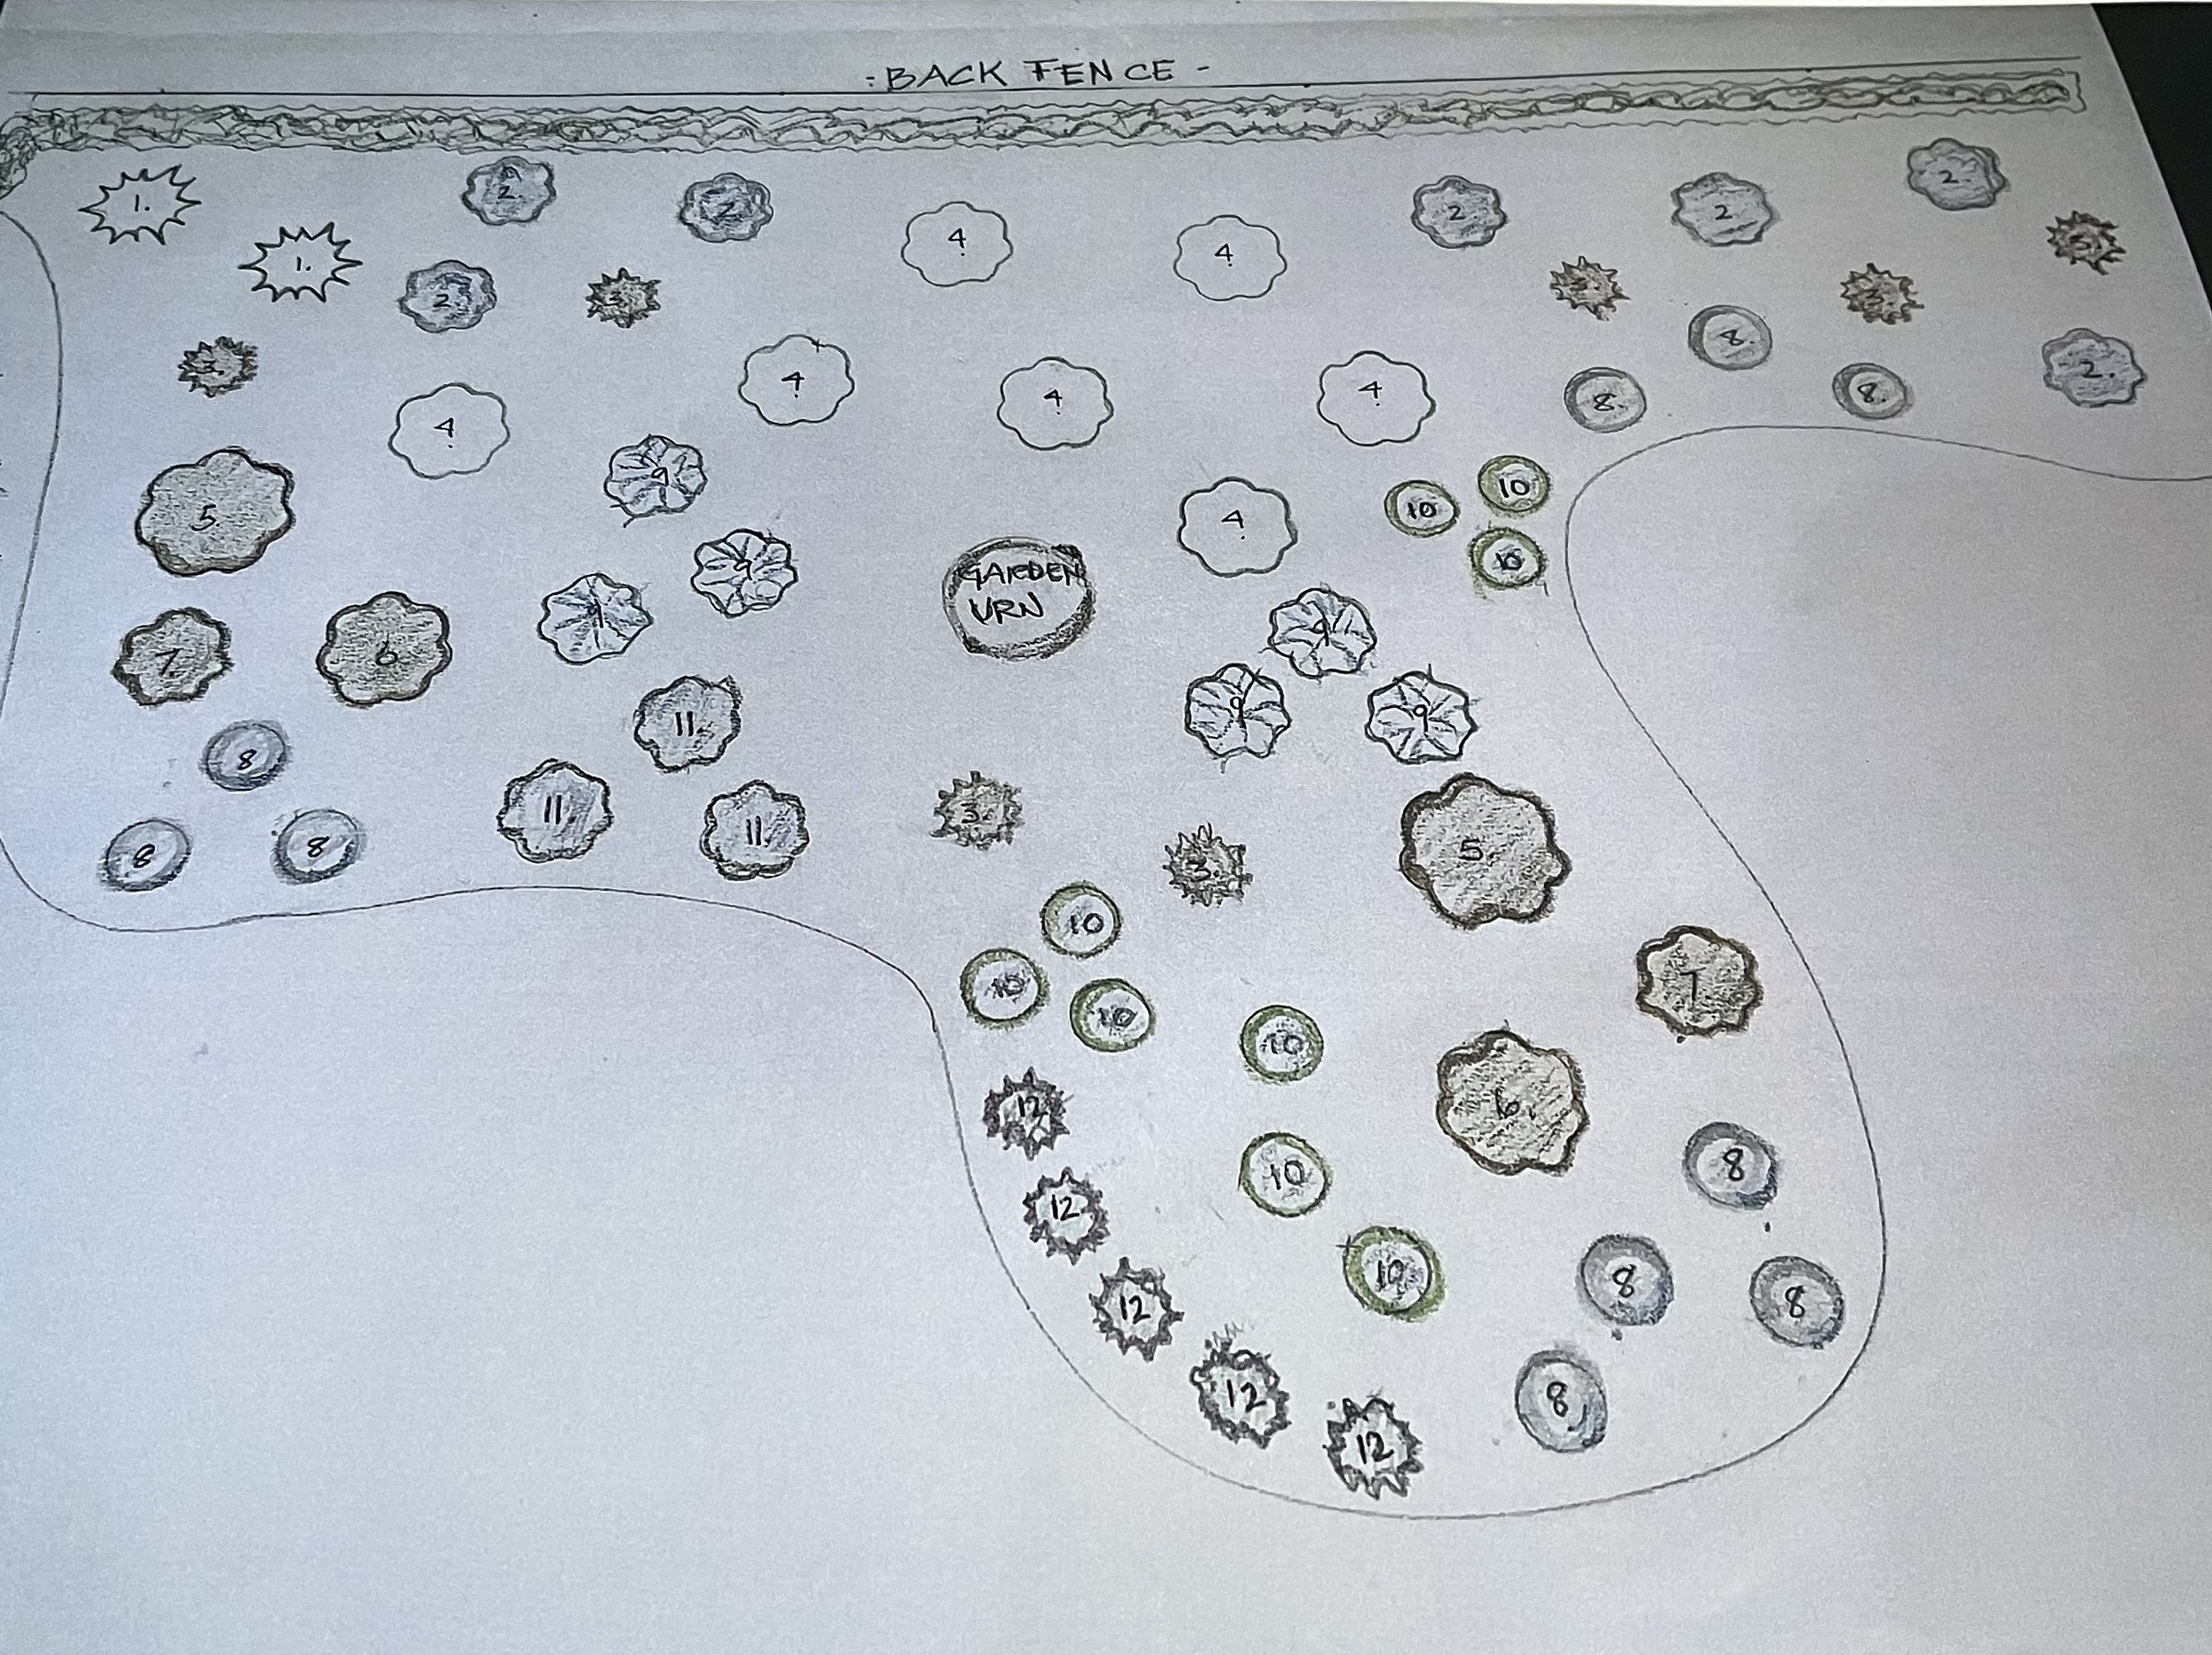
Luckily, I had a very talented client that creates the most beautiful gardens and was willing to create a planting design for my garden. We started with a layout of the backyard and she got to work selecting the array of plants to fill in the larger bed areas.
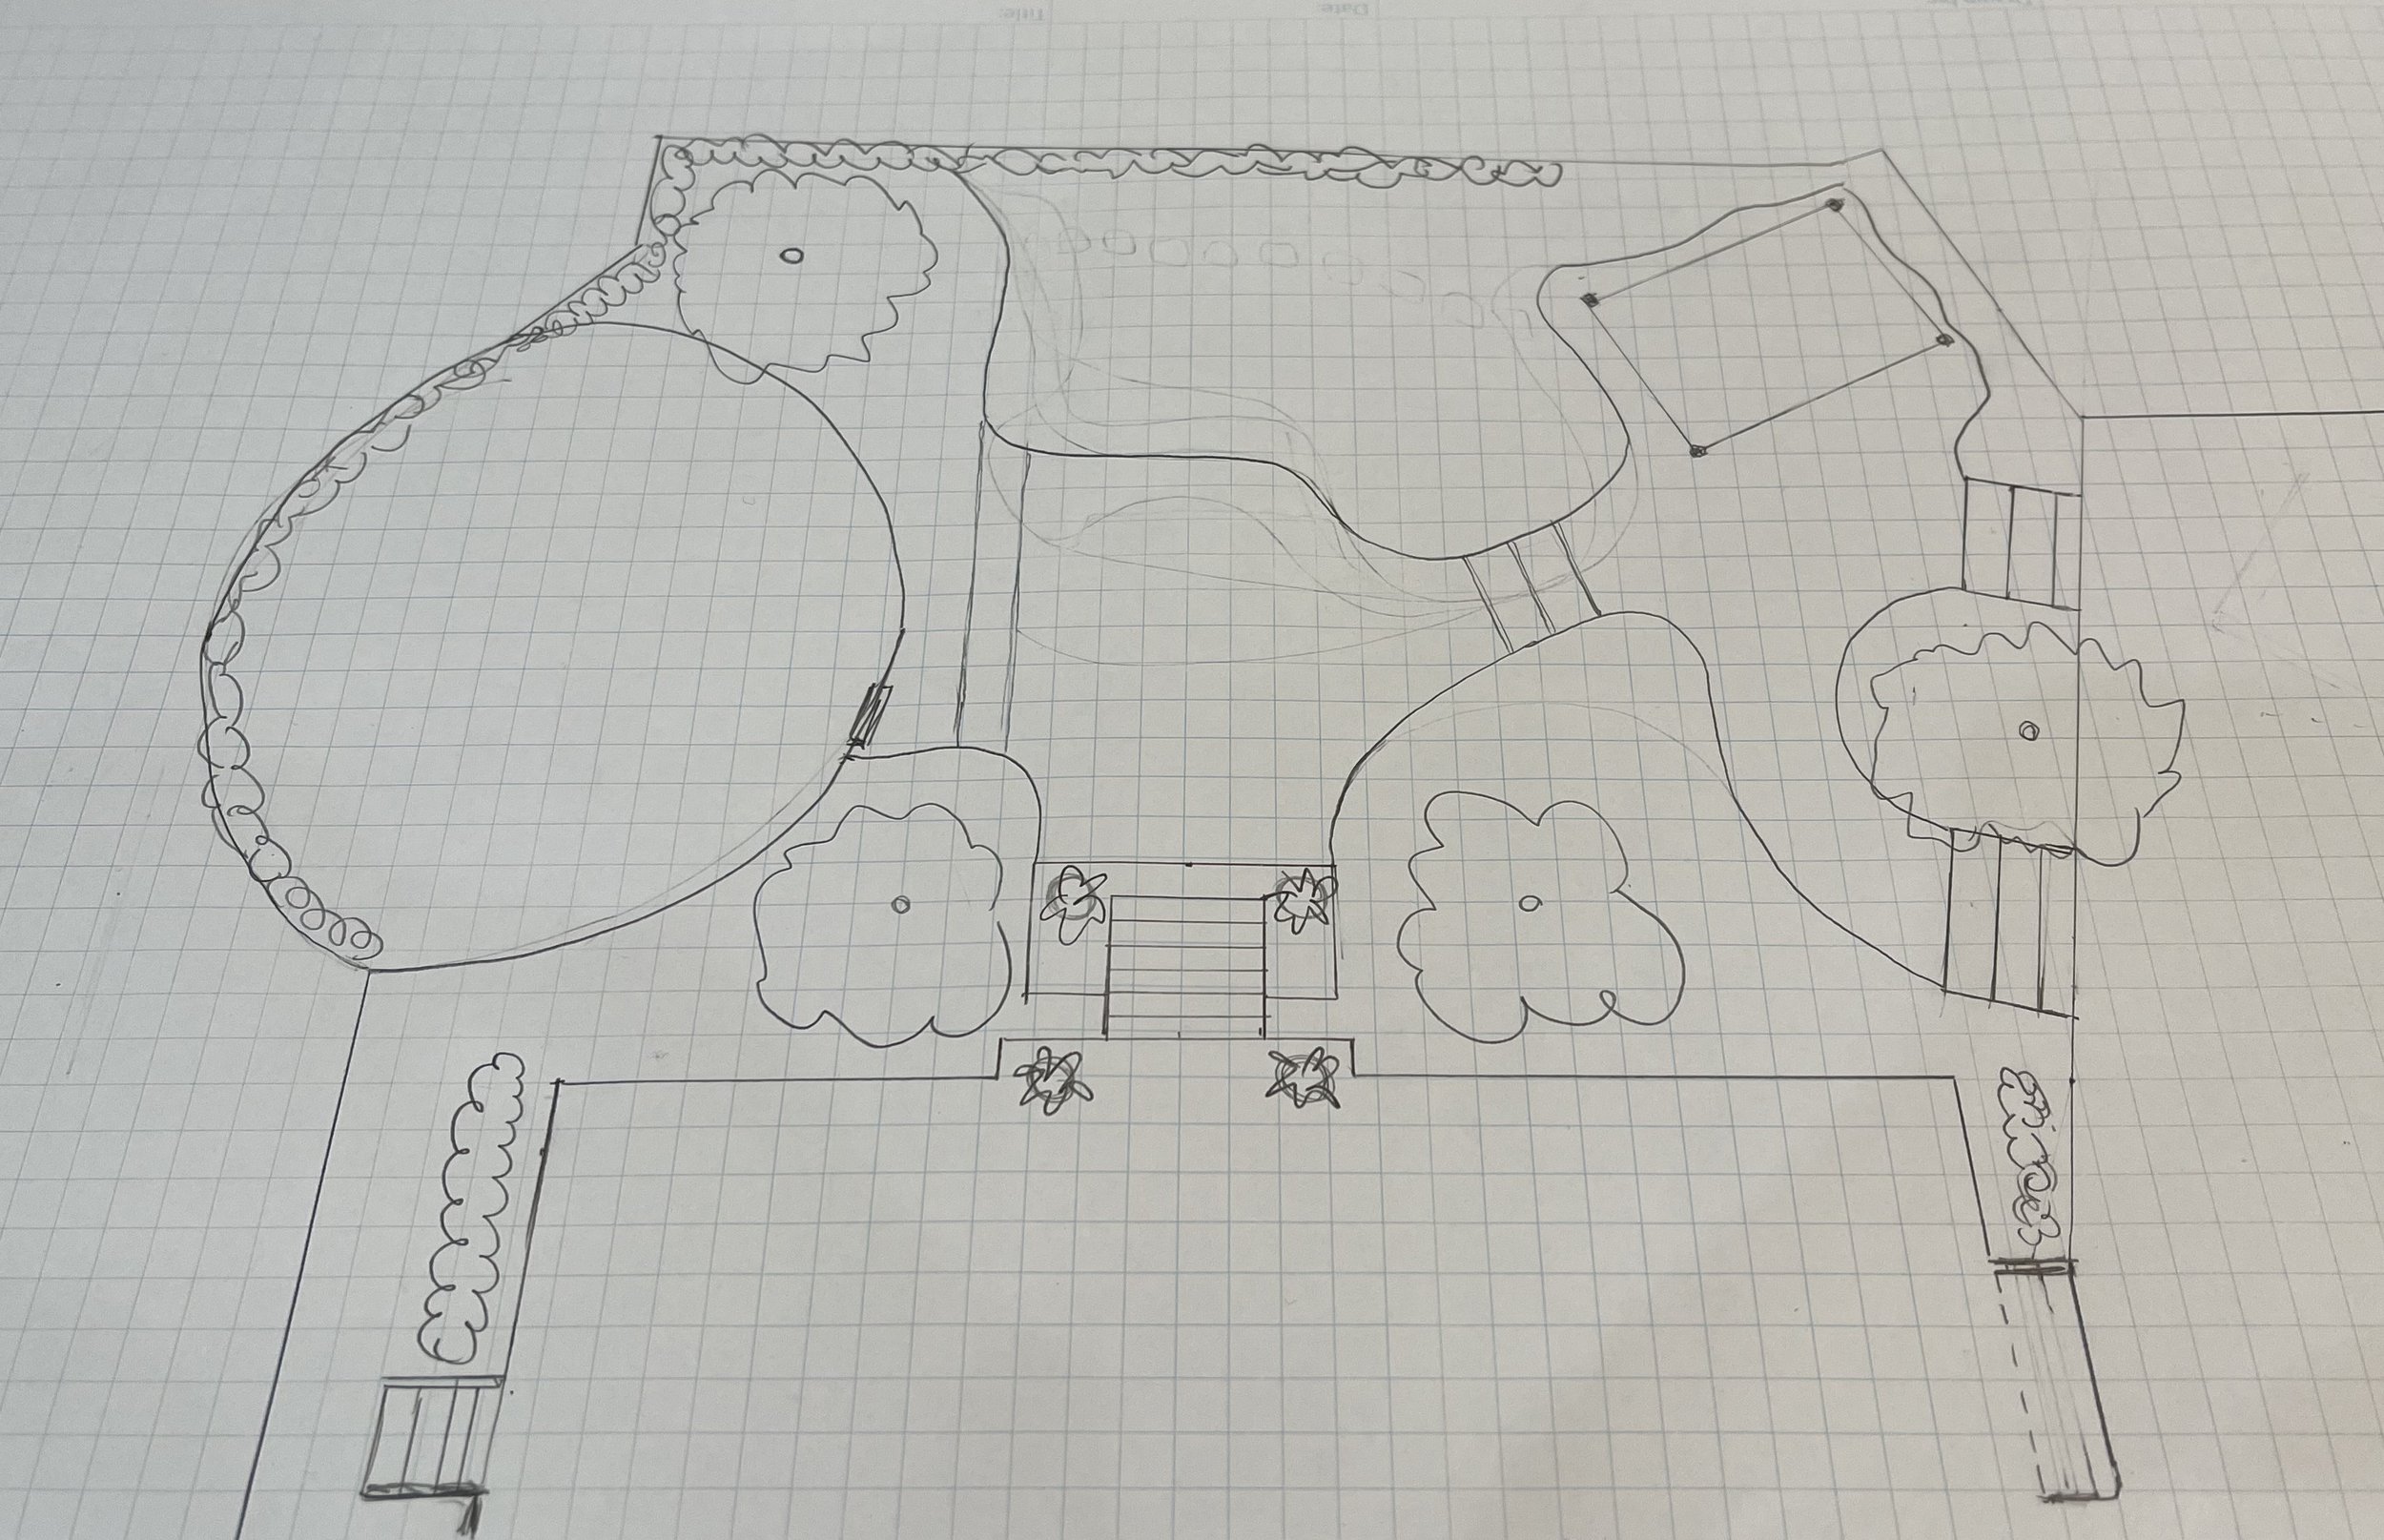
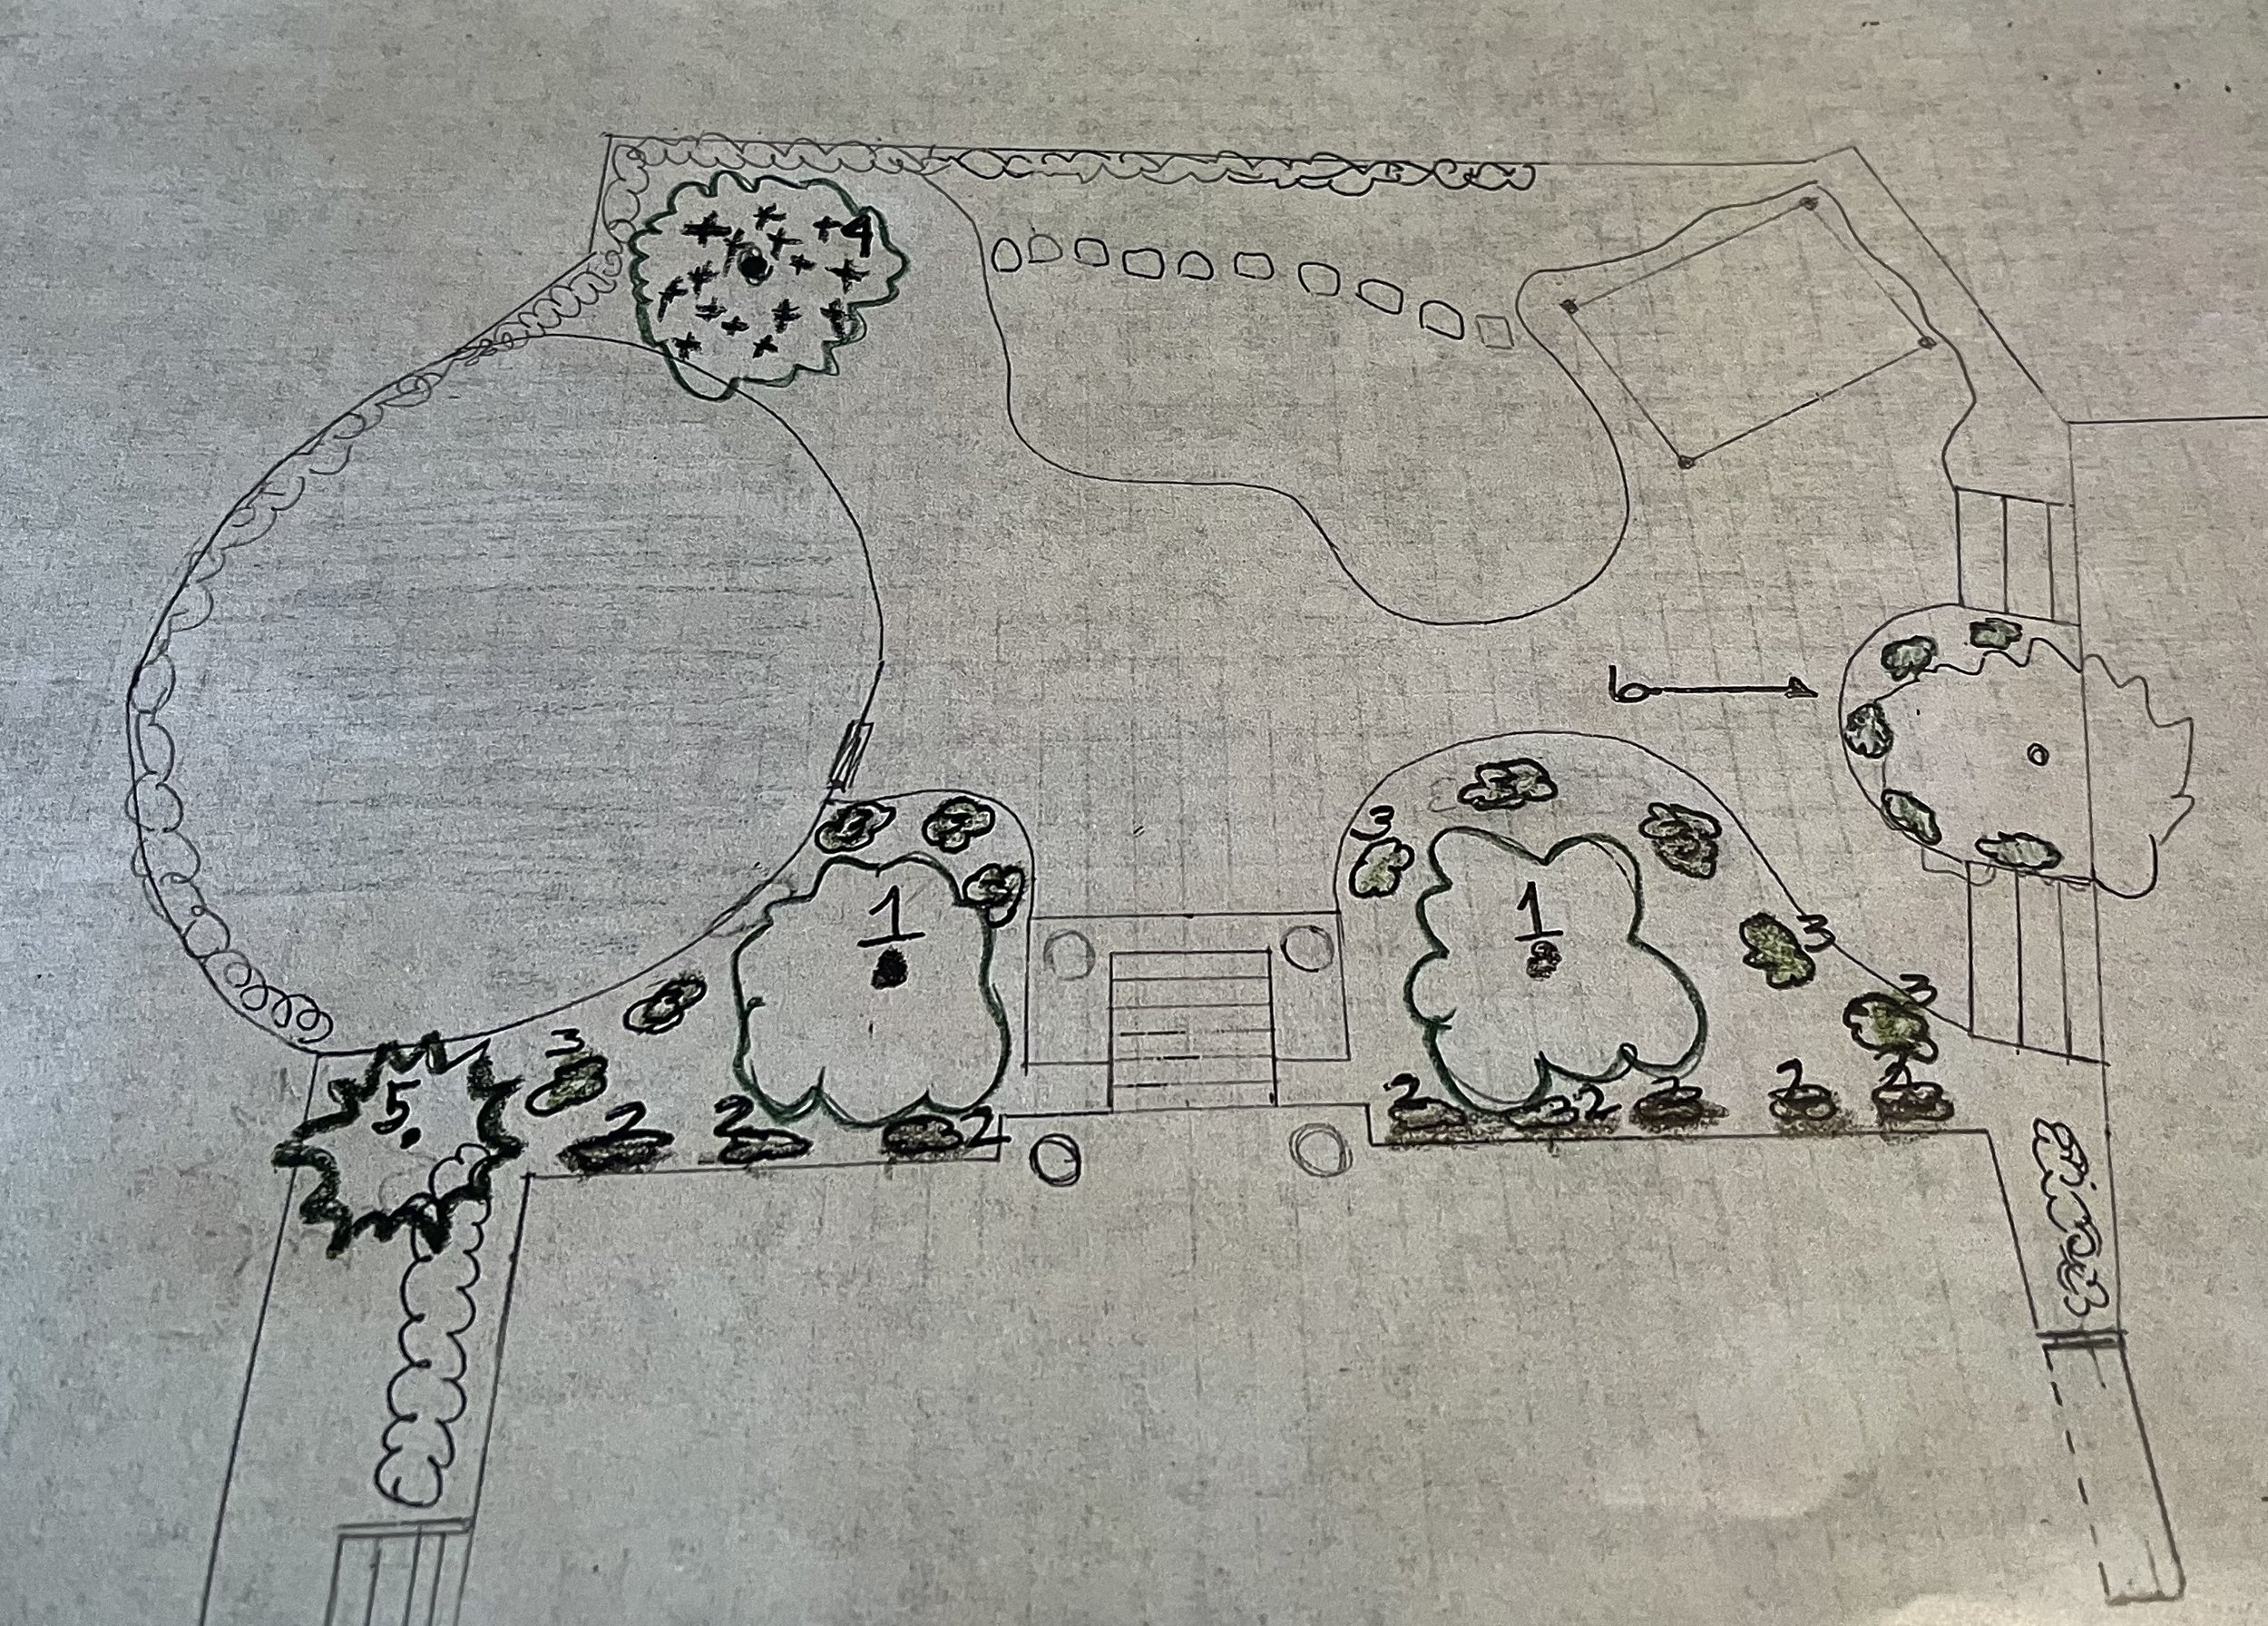
Here is the garden layout and the planting design.
And here are some images of the selected plants for the backyard. I just love the mix of color, texture and shapes. There are plants that I wouldn’t have selected independently but they work so well together. It reminded me of what we tell clients about trusting the process and not picking the design apart, or looking at things as individual pieces. Funny, when you see that from the other side. And, I am happy to report that I did just that, I trusted the process, and I absolutely love it!

This is what it looked like before. It served its purpose and acted as a great place for kids to play badminton, run around like crazy people and dry off from a swim. My oldest daughter is still trying to come to grips with the change in her childhood home...don’t worry, she’ll be fine.


We started by laying out the two large beds to create a path down to the lower level with a few steps.
We knew that we wanted to level out the area off of the steps and at the pool. So Canepa Landscaping started with digging out that area to get it level and began working backup towards the barbecue so we could figure out how to address the grade changes.
I wanted to create a feeling of flow from one level area to the next which is why I had the path angle back towards the main deck stairs.
We had originally explored the idea of making the stairs off the deck wider but the cost was prohibitive. So, creating a good space planning flow proved to be the best option.

Then Canepa started on building the stone planter walls.

Here is Dan Bell trying to figure out if this is a good idea.
It is always a little ugly before it gets pretty…

And we picked stone steps out of slab material to make the steps from the lower area up to the pergola sitting area.

The last construction piece was finishing the steps from the barbecue patio down to the garden. Luckily, the pavers were still available.
Lord knows what plan B would have been had they been discontinued.

We had the back hedge row of pittisporum from the old landscape plan and it made the perfect backdrop for the new garden bed.We are going to let it grow tallerso it creates a feeling of privacy.

Getting so close to planting and seeing it all come together...
And of course a couple trips were made to Cottage Gardens in Petaluma for both inspiration as well as a number of purchases. I loved the cement orbs and talked Mr. Bell into purchasing a few sets!


I love the color of this set. Such an inspirational nursery.
So thankful to have it so close by.
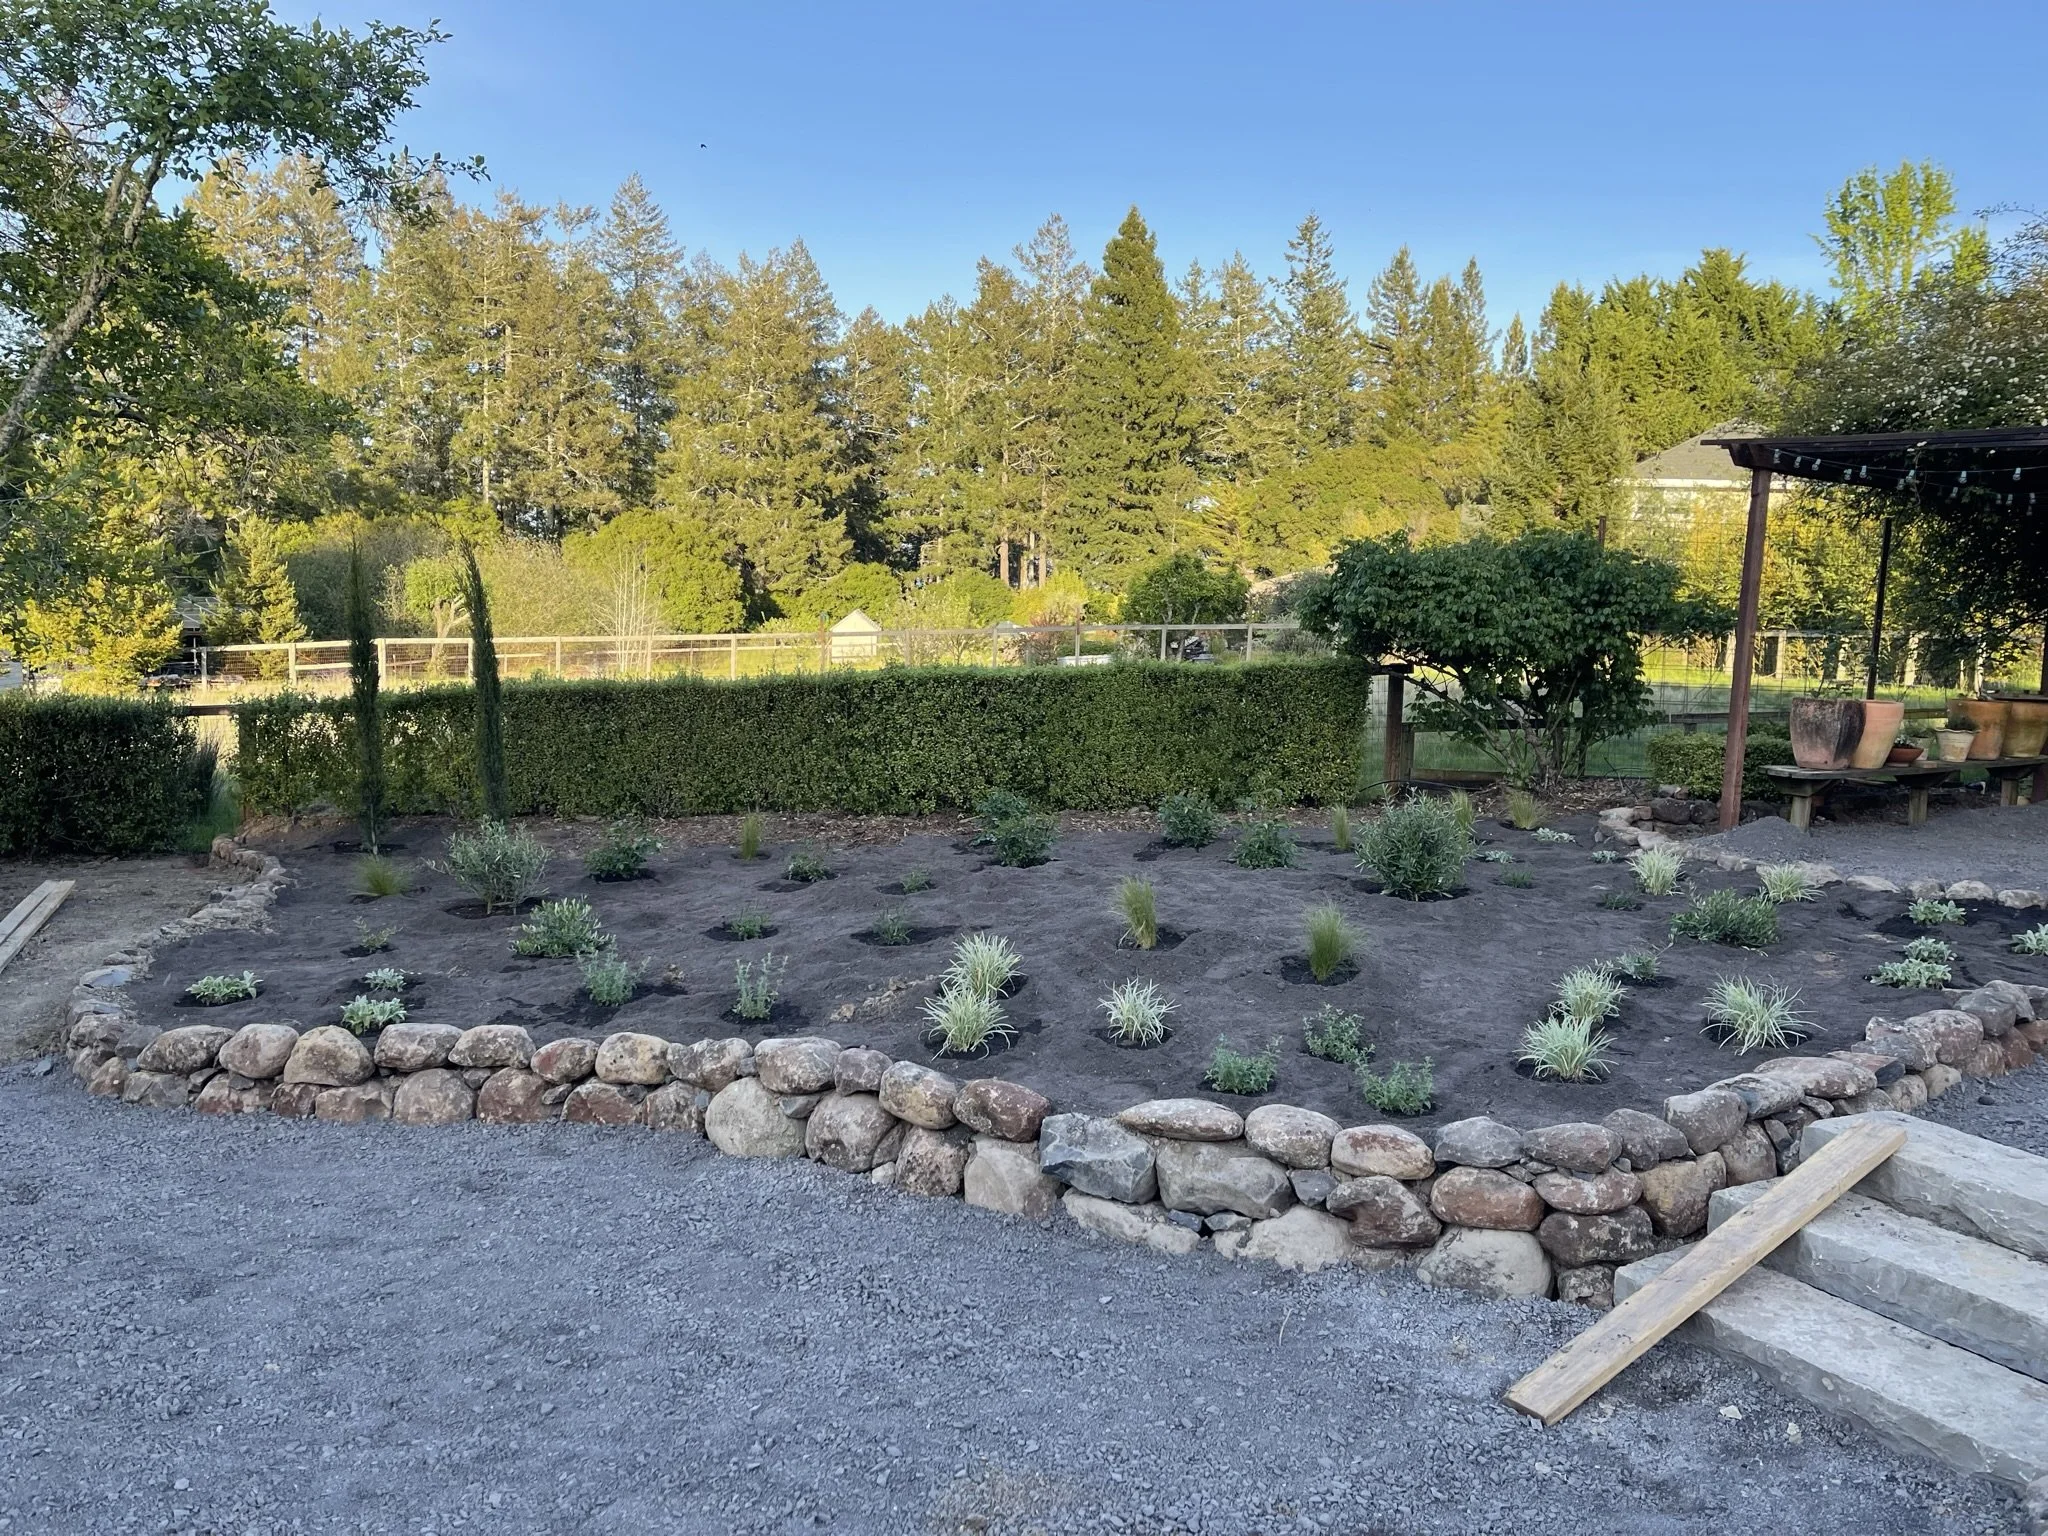
Once the hardscape was laid out and additional soil in place, we staged the plants based on the plan to make sure that all looked good on site. We needed a few additional plants but the general plan gave a good baseline for additions.

Next up would be irrigation and the gravel. We chose Trinity which has both warm buff colors along with some gray. It worked nicely with the Sonoma stone that was already onsite and all the tones of green added in the plantings. I have always loved gravel, it reminds me of European gardens and adds a casual feel to spaces. The Trinity adds a layer of elegance in my opinion. And, here is the final product. I am so happy with the layout and the new plants. I think it works perfectly with the style of our home.
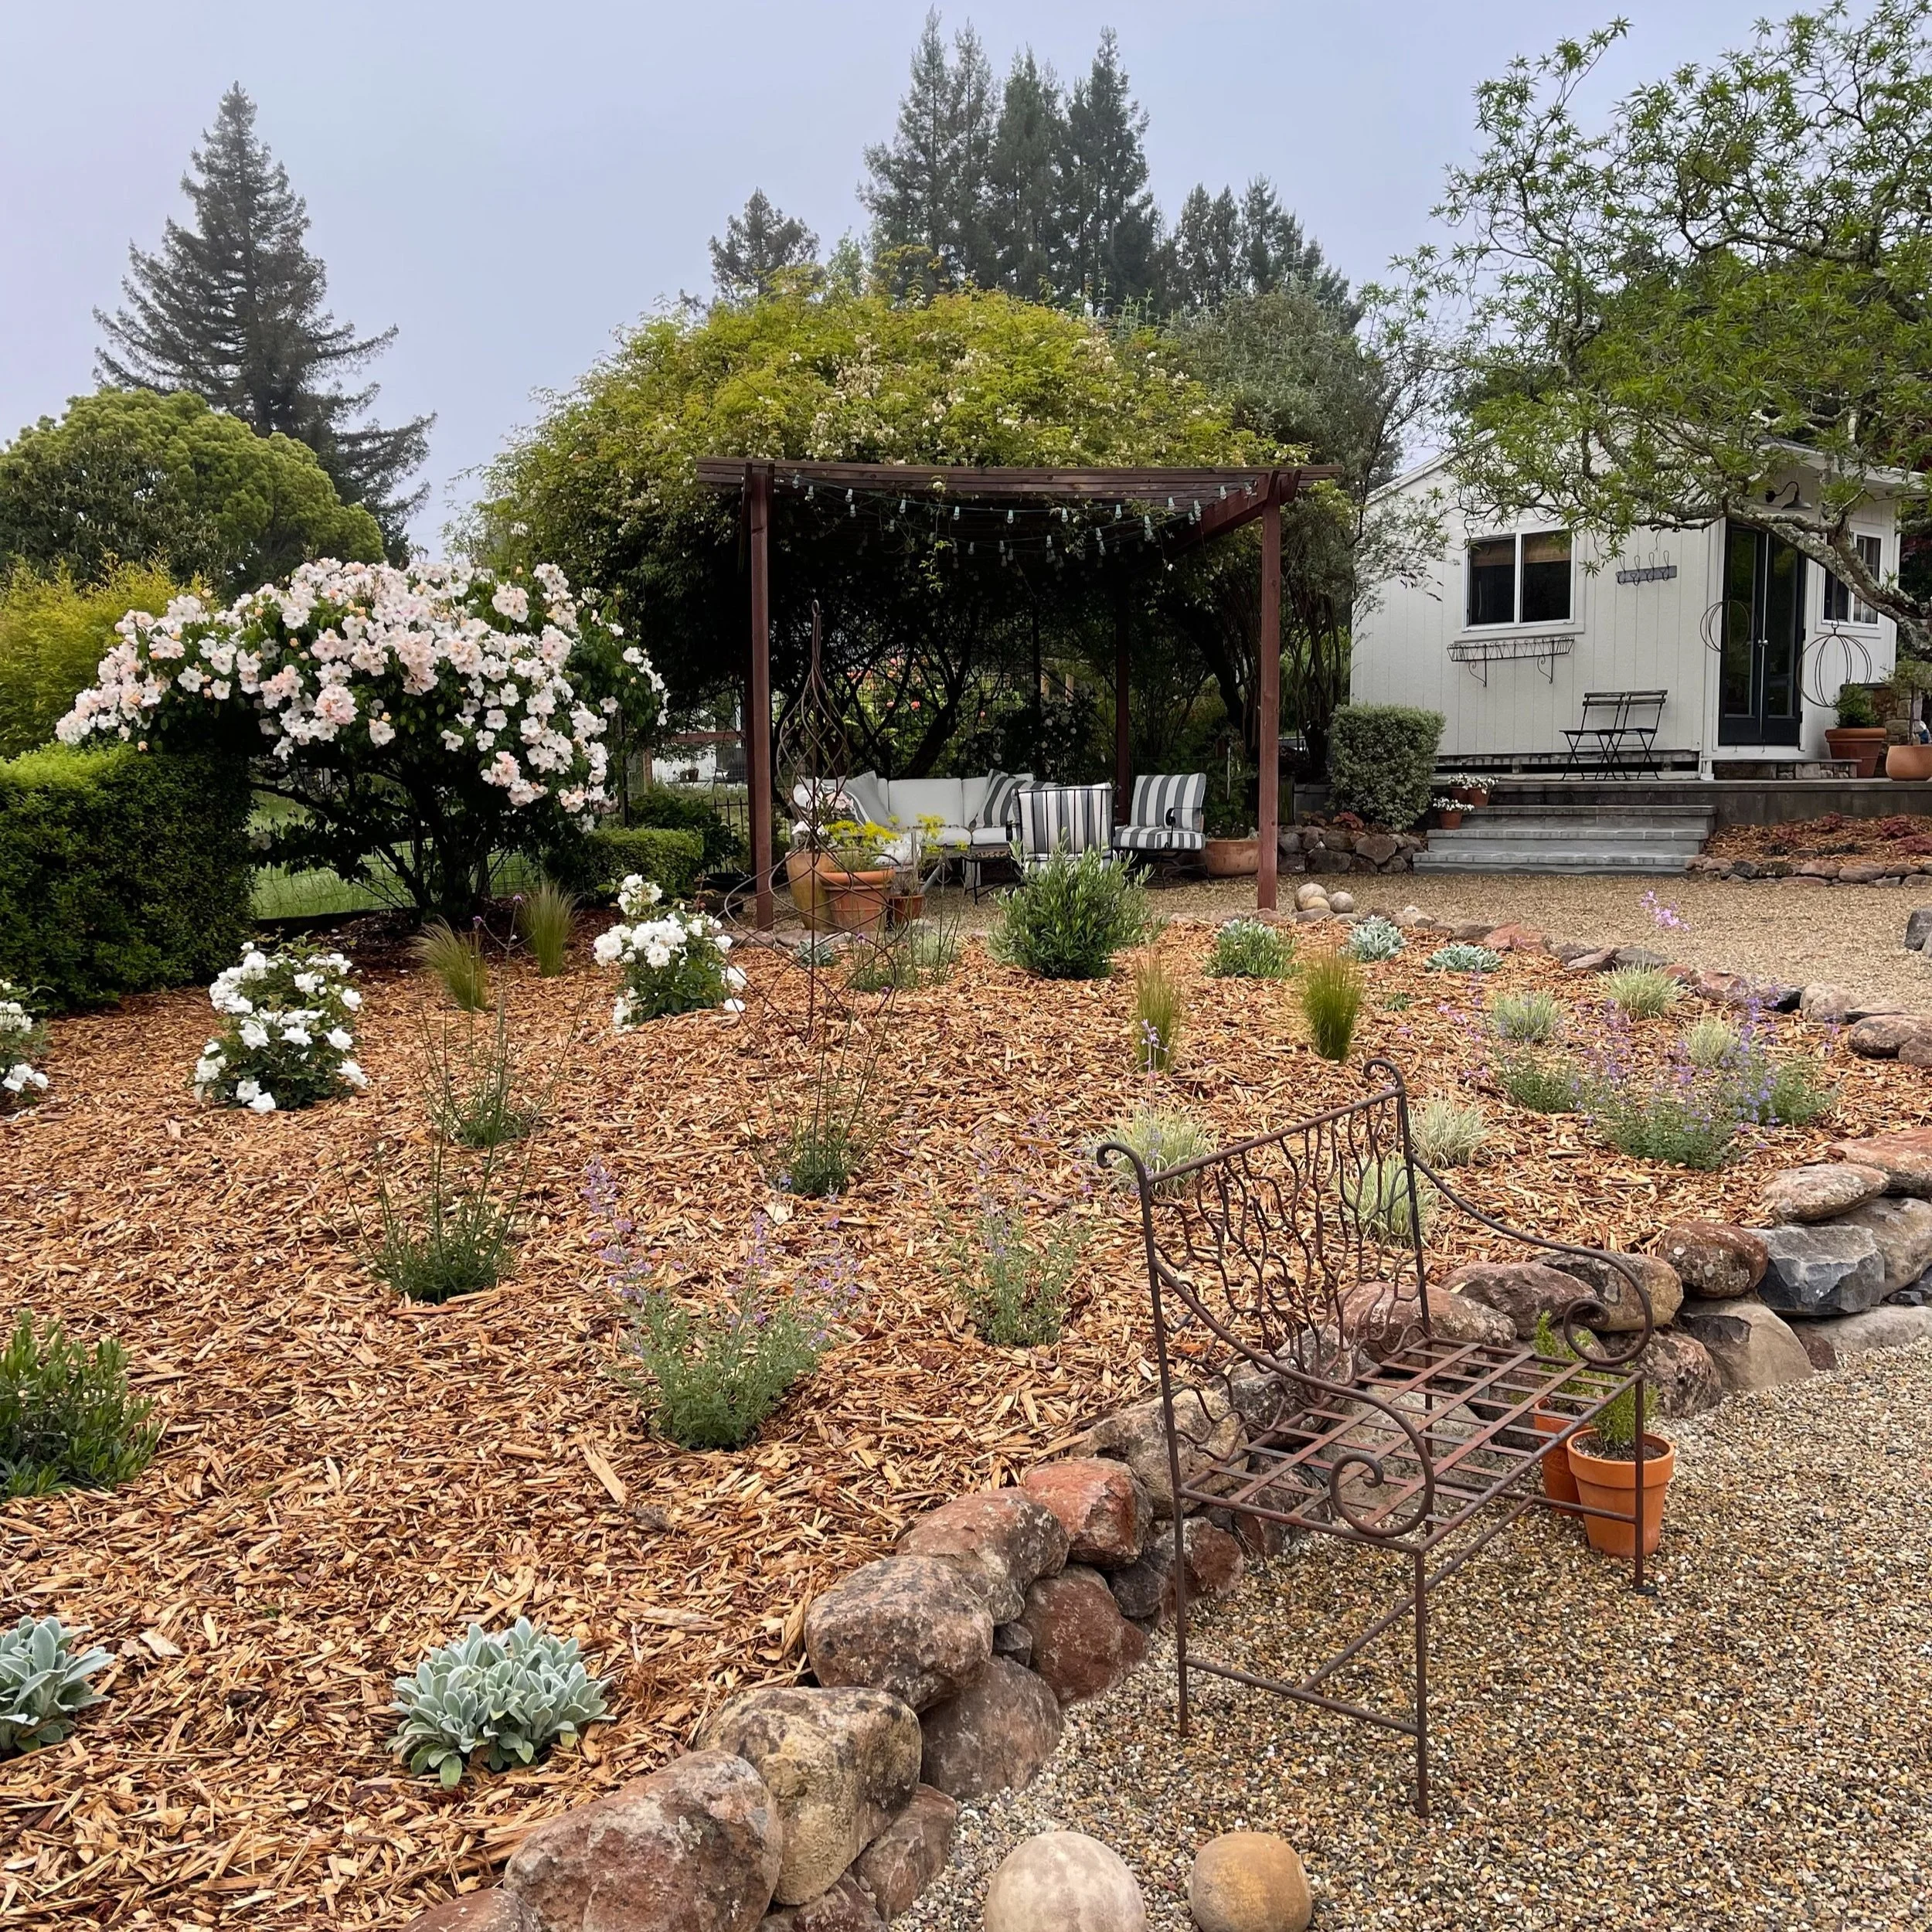

It takes a village, but it is so gratifying when it all comes together!
Cheers, to good weather and more time spent outdoors!

View the interior design of Harrison House on our portfolio page here.